
Installation Instructions
Installing your Quick Coupler is Easy
You need to gather your new Quick Coupler, a wrench, a pencil and a drill to begin.
Attention: ONLY install the coupler onto a gooseneck trailer receiver tube designed for 4″ round or 4″ or 4.5″ square adjustable coupler. ONLY use the Quick Coupler with a 2 5/16 ball. Use of safety chains is always recommended.
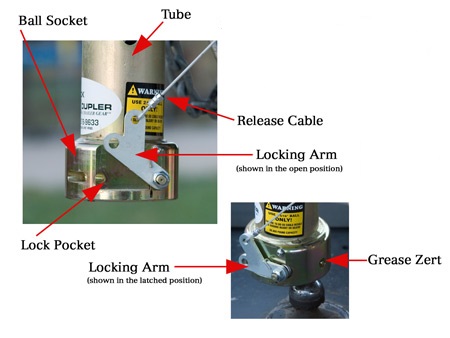
Get acquainted with your new Quick Coupler …
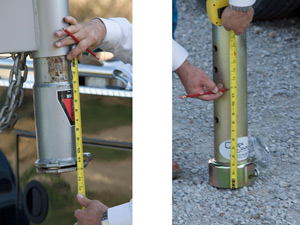
1. Before removing the original coupler you need to measure to obtain the correct position at which to install your new Quick Coupler for proper trailer neck height.
Begin by measuring the length from the bottom of the trailer receiver tube to the bottom of the coupler. Now use this measurement to mark the same height on the Quick Coupler. A pencil works great to mark the position.
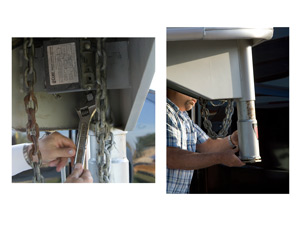
2. Now you’re ready to remove the original coupler.
First loosen the two (2) locking jam nuts and the two (2) coupler set screws. Be careful to support the coupler so when it becomes free, it won’t fall. Slide the original coupler out.
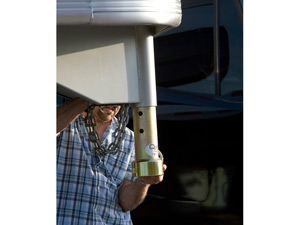
3. It’s time to position your new Quick Coupler.
Slide the Quick Coupler into the receiver tube. Rotate the Quick Coupler so the locking arm (see arrow in diagram above) is in the proper direction of pull for the release cable when it is installed. This always positions the locking arm on the driver’s side of the vehicle. Make certain the locking arm is in such a position as the pull is as straight as possible from the arm through the cable guide to the hold open tab.
Adjust the height of the coupler to the marked trailer height making sure that you leave enough coupler tube in the receiver tube to securely tighten both trailer coupler set screws. Don’t forget to also tighten both the locking jam nuts.
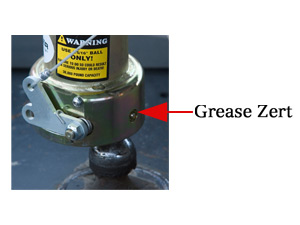
4. Once the coupler is properly and securely installed and has been lowered onto your hitch ball, you need to lubricate the hitch ball and the ball socket of the coupler.
Use the grease zert located on the rear of the coupler. When you lower the coupler onto the hitch ball it will automatically lubricate the ball. Be sure to use a quality multi-purpose grease to prevent premature wear of the coupler ball socket and hitch ball. Periodically repeat this lubrication process to maintain smooth operation of your hitch.
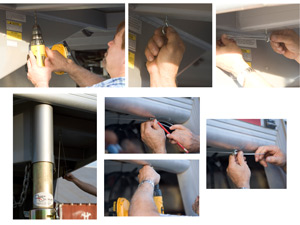
5. The final step to install your Quick Coupler is to route and install the pull cable using the hardware kit.
This includes the cable guides, pulley, hanger and self tapping screws to route the cable as closely as possible to a direct line of pull.
Use the provided screws to install the hold open tab in the correct position where the cable will hold open the locking arm.
You are now ready to use your coupler. To hook up, simply lower the Quick Coupler onto the 2 5/16″ ball. There is no need to worry about latching the hitch. The locking arm will automatically latch each time it lowers onto the ball.
To unhook, simply pull the release cable until the locking arm rises into the open position and let it rest in the hold open tab. Now you can dolly the coupler clear of the hitch ball and truck bed. Be sure to remove the release cable from the hold open tab so you’re ready to hook up next time.